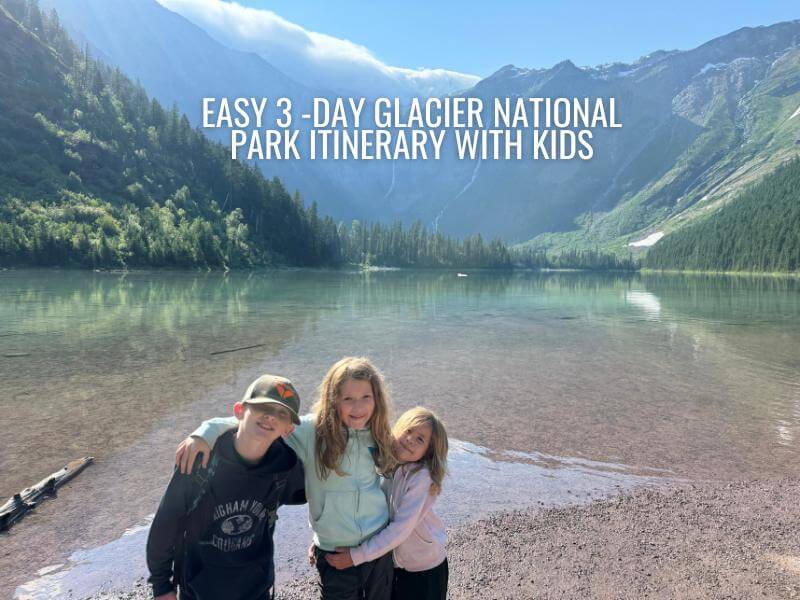
Easy 3-Day Glacier National Park Itinerary with Kids
Welcome to the best 3-day Glacier National Park itinerary for your family!
Planning a trip to Glacier can feel overwhelming because there is so much to do, and often not a lot of time. We have visited over 20 national parks as a family and got to spend several fantastic days in Glacier National Park with our kids ages 10, 8, and 5.
If you’re traveling with your kids to Glacier, follow this itinerary to experience some of the best that the park has to offer, while not pushing the kids too hard. From the ever-popular Avalanche Lake to a laid-back kayaking excursion on Lake McDonald, find out about hikes, activities, and must-see experiences for those with only three days to explore with little ones in tow.
There is a reason people call it the Crown of the Continent, and I can’t wait for you to explore it with your family.
Disclaimer: By clicking my links and making purchases, I may make a small commission with no extra cost to you. As an Amazon Associate I earn from qualifying purchases.
Establishing a Home Base
You may wonder which entrance to Glacier is best, and I honestly think you can’t go wrong. There are also several regions of the park and to truly experience it all you need more than three days. But I am a firm believer that any time spent in a national park is worth it!
We were based in the western part of the park so that will be the starting point each day in this itinerary. During peak travel season (late May to early September), you are required to have a vehicle entry pass to enter Going-to-the-Sun-Road between 6 am and 3 pm from the West Entrance. This itinerary is set up so that you only have to secure that pass for one of your three days.
Day 1 in Glacier: National Park Sign, Lake McDonald
Snag a Photo by the Glacier National Park Entrance Sign
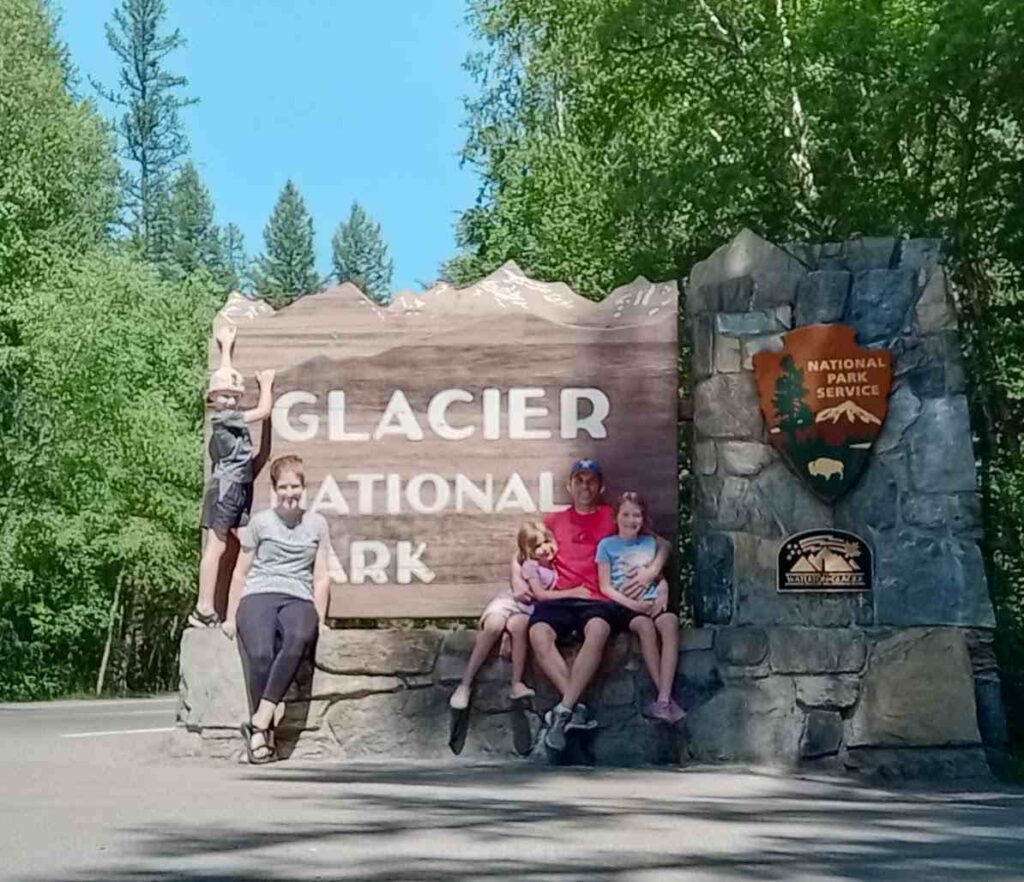
One of our favorite activities at each park is taking a picture with the National Park sign. I highly recommend you stop and take the picture as soon as you see the sign (shortly before the West Glacier entrance station). We opted to wait until we were leaving the park and by then we were tired, smelly, and less enthusiastic about the whole thing.
Photo tips: Often you will come across other visitors who can snap a picture for you. Make sure to have your phone settings ready to go, and give the photographer some easy instructions so they know how you want it framed. If you don’t have anyone else to take the photo, have a small tripod like this one ready to go so you can get the perfect shot!
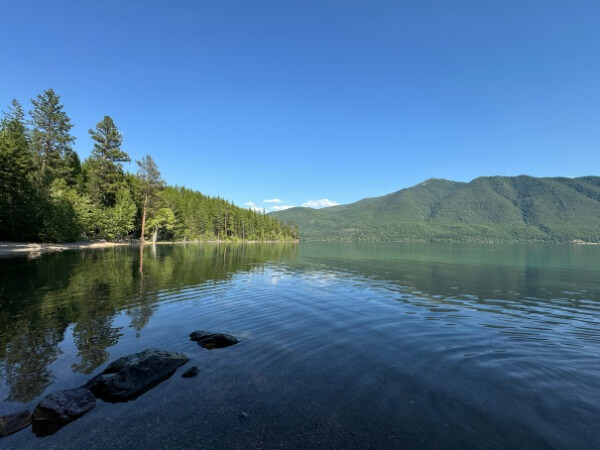
Visit Lake McDonald & Apgar Village
Once you’ve secured your photo and paid the entry fee at the West Entrance, you will drive a few more minutes (about 2 miles) until you see the signs for Apgar Visitor Center. Pull into the large lot and head to the ranger information line. Here is where you can grab your Junior Ranger books and ask any questions you might have.
I like to share my tentative itinerary and what we’re hoping to see and do and get feedback from the rangers. Again, you do NOT have to have a vehicle reservation to stop at Apgar, but if you want to continue any further into the park you will (seasonally). Please note, that you do need to pay the park entry fee, even if you are not using Going-to-the-Sun Road. It is $35 a vehicle for seven days, or free with an America the Beautiful or 4th Grade Parks Pass.
Things to know about the Apgar Visitor Center:
- It can get crowded, but if you can’t find a parking space simply circle for a few minutes and one is sure to open up.
- The line to speak with the ranger can get long. This is a great time for one person to wait while the rest of your group refills their waters, goes to the bathroom, and if they are especially antsy they can start walking to Apgar Village where you can meet them when you’re done. Just know that cell service is spotty so have an arranged meeting place and time to avoid searching for one another.
From the Visitor Center, you can walk or drive to Apgar Village. There is very limited parking, so I recommend using the Apgar Bike path and walk about 8-10 minutes if you have the energy. Apgar Village is a small area made up of several shops, Eddie’s Café for meals and ice cream, rental locations, and the Apgar Nature Center.
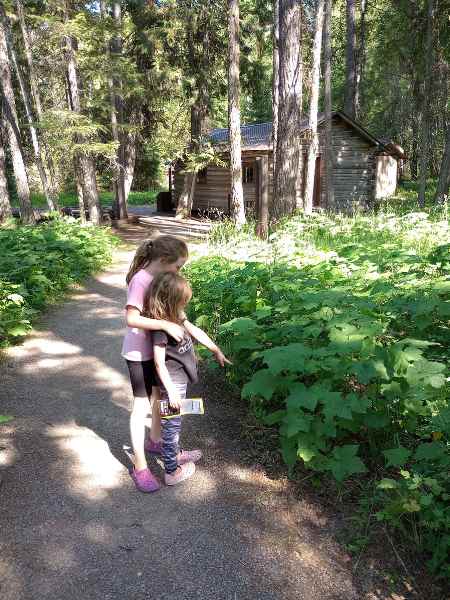
The Apgar Nature Center is usually open 10 am to 4 pm during the summer and is a great stop for kids to have a hands-on experience. While the programming varies, they might have the chance to handle animal pelts, complete a craft, or learn from a ranger.
Spend an hour or two grabbing some food and sitting along the shore of Lake McDonald. My kids were obsessed with skipping (and throwing) rocks and wading in the water…sometimes a little too far. Consider bringing water-friendly shoes or sandals and even a change of clothing if you have adventurous children.
Check out these highly rated water-safe hiking sandals for kids. Perfect for hiking and lake days.
Get Acclimated
You’ll be back at lakes every day of the trip, so don’t worry if you don’t get enough time. Make sure you are settled into your accommodations relatively early so you can be up and ready to go the next day.
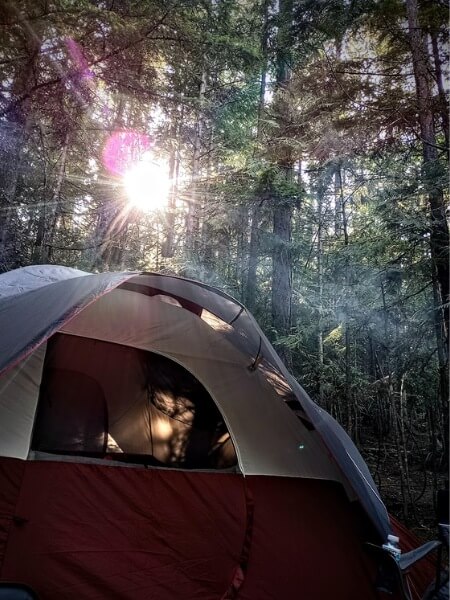
We opted to camp at the Fish Creek Campground, just a few miles from Apgar. It was the perfect spot for our family – close to the lake for evening rock throwing, bathrooms with flush toilets, a fire pit, and easy access to the park.
There are several other campgrounds near the west side of the park including Apgar (largest in the park), Sprague, and Avalanche Creek. If camping isn’t your style there is also the Lake McDonald Lodge and Village Inn in Apgar. There are family units available at Village Inn that can sleep up to six and a cabin option at the Lake McDonald Lodge for a family of 5. Most rooms, however, cater to 2-4 guests.
While I highly recommend staying within Glacier to maximize your time and avoid the crowds by getting there early, there are plenty of accommodations within 30-45 minutes of the West entrance. Consider staying in the towns of West Glacier (10 minutes from Apgar), Coram (15 minutes), Columbia Falls (30 minutes), Whitefish (45 minutes), or Kalispell (50 minutes). Be aware that you will pay a premium for being in the park or close to the park. For budgeting purposes, just know that you may end up paying more than you’d like for an average room.
Day 2 in Glacier: Avalanche Lake, Going-to-the Sun-Road, Sun Point Nature Trail, Hidden Lake Overlook
Rise and shine! Today is full of activity. If you were able to snag a vehicle reservation, you can get up a little later, but you will still want to be inside the West Entrance by 7:00 am or so if possible.
Trail of the Cedars
If you’re planning to hike with your kids in Glacier National Park, the Trail of the Cedars and Avalanche Lake Trail are two very popular options – and for good reason.
You will start with the Trail of the Cedars, an easy 0.9-mile loop that typically takes about 30 – 45 minutes at a leisurely pace. This is a stroller-friendly path that winds through a delightful forest of western red cedars and features a boardwalk for much of the route. You can go either direction, but we went clockwise to begin. I’d recommend this route as you will be able to stop at some bathrooms at the end of the hike without having to wait to get to the parking lot to use the restrooms, and with three kids in tow, there is always someone who needs to go to the bathroom!
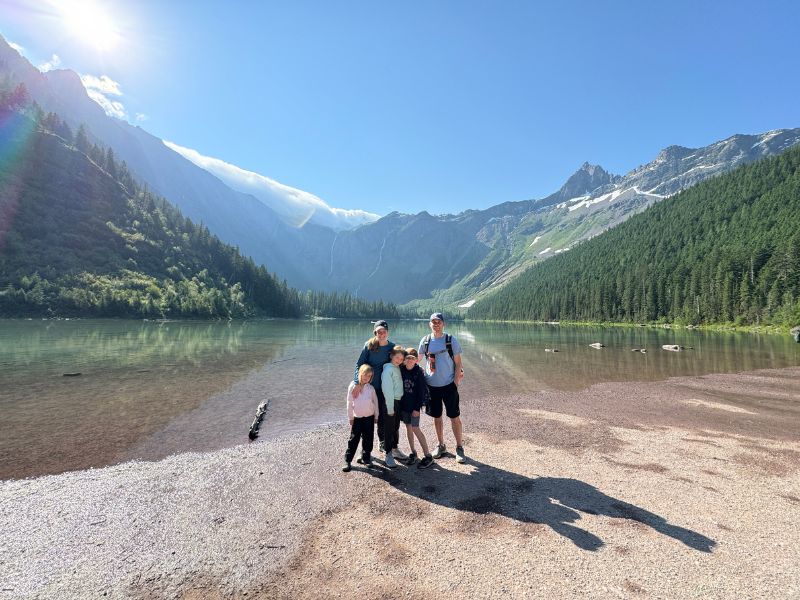
Avalanche Lake
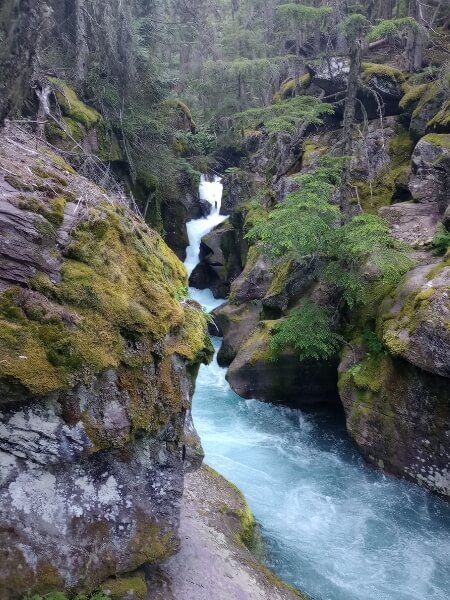
About halfway through the loop, you can continue on the path and return to your car, or you can head up to the Avalanche Lake Trail. This is a 4.5-mile round-trip hike that can take up to 3 or 4 hours for those at a slower pace. The views throughout the trail are phenomenal, and while it isn’t extremely steep, it was a pretty steady climb for much of the hike. You start along the river and eventually climb up and away.
Just before you reach the lake there are two pit toilet outhouses to the right of the trail. Be warned – they are even more rugged than the typical national park toilet. There was no sanitizer, and you might want to bring TP with you as well, in case it isn’t available.
Just a few more minutes of walking, and you will approach the lake. Take time to sit and enjoy the beauty. While you can continue and hike along the shore, I don’t recommend it with young kids because you still have a long hike back and more to cover the rest of the day. Take a thousand pictures, record some videos, and continually exclaim, “Wow. This is amazing!”
The hike back felt very long because we were tired, less impressed with the scenery (although it was still incredible), and the complaining really picked up. But the only way to be done was to keep walking, and so we did. I highly recommend doing this as the first hike of the day if you have younger kids or are traveling with inexperienced hikers. It would be pretty difficult to complete if your kids were already tired from earlier activities.
When I checked my mileage after returning to the car, we had hiked about 6 miles – much more than I had anticipated. My kids were worn out, irritable, and ready to go back to camp. But after some snacks and shows (yup, we gave them screens!) they were ready for our next adventure when we got there. When planning your itinerary, aim for a balance between high and low activity levels.
Going-to-the-Sun Road
The drive from the Avalanche Creek Picnic Area to the Sun Point Nature Trail parking lot takes about an hour. This was perfect for our kids because it gave them time to rest and recover from all the work they did. To access the next stop, we drove along the famous Going- to-the-Sun Road.
It is an engineering marvel, that took 10 years to complete, but once finished created a scenic route directly connecting the park’s east and west sides. The road extends 50 miles and every spring, a dedicated crew spends weeks clearing the road of up to 80 feet of snow so that it is open for the busy summer season. It’s important to note that there is no guaranteed opening date for the road. In recent years it has opened as early as June 16 (2016) and as late as July 13 (2020 and 2022).
You can easily spend several hours driving the road in one direction and stopping at several viewpoints and trails. We opted to keep driving because of how tired we already were, but I’d recommend pulling over at a few lookouts with parking and admiring the views outside of the car.
We didn’t quite drive the entire road – we stopped about 10 miles west of the St. Mary Visitor Center at the Sun Point Nature Trail and then headed back west after. If you want to drive the entire road, consider stopping at Wild Goose Island Lookout and ending at the St. Mary’s Visitor Center.
Sun Point Nature Trail
Sun Point Nature Trail was exactly what we needed to ease back into hiking. About 15-20 minutes from the Logan Pass Visitor Center, you will take a right (if heading east) off the main road that leads you to the parking lot. There were plenty of spaces when we visited around noon.
There are the typical pit toilets, a shuttle stop, and several trail options. To the left of the toilets (if looking directly at them), you will walk a little and find the beginning of the nature trail.
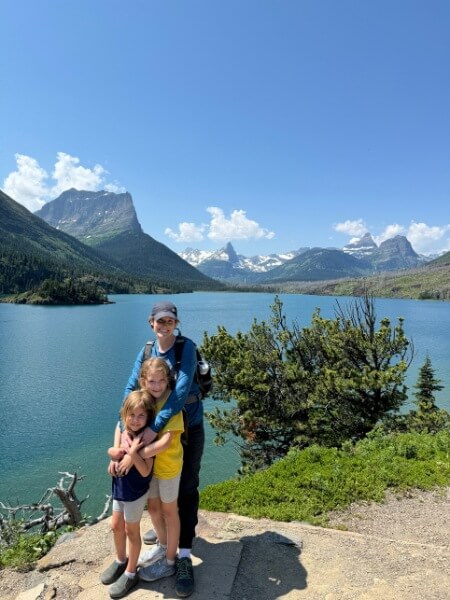
It is a very short trail that can be completed as a loop. It is not stroller or wheelchair-friendly, but young children can easily walk it or be carried. However, the path leads you to an expansive overlook of St. Mary Lake and there are no guard rails or fences, so little ones that like to wander need to be supervised very carefully.
I highly recommend this stop – you get the “wow” factor with very little effort. It was rejuvenating for our family and was somewhere we could easily walk to, admire, and just explore for a few minutes before heading to our last destination.
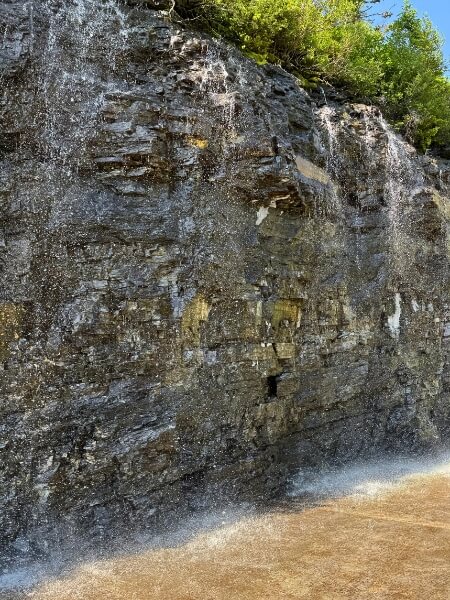
Plan to spend about 30 minutes, unless you choose to extend the hike. From the same parking lot there is a trail that leads you to three waterfalls: Baring Falls, St. Mary Falls, and Virginia Falls. A complete round trip would be about 6.4 miles, but you can also opt to catch a shuttle at St. Mary Falls and ride it back to the parking lot. While the idea was tempting, we didn’t have it in us to go that far. If you are staying in East Glacier, this location is about 20 minutes from the St. Mary Visitor Center, 30 minutes from Babb, and 50 from Swiftcurrent near the Many Glacier section of the park.
Hidden Lake Overlook
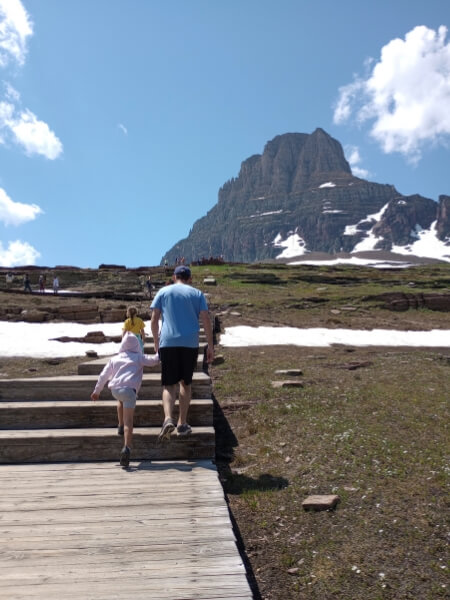
Our last official stop for the day was the Logan Pass Visitor Center and exploring the trail to Hidden Lake Overlook. Located at the highest spot on the Going-to-the-Sun Road, the Logan Pass Visitor Center is very popular and parking can be an issue. While some people will be there all day, many visitors stop for a quick bathroom break (flush toilets!), water, and to explore for an hour or two, so spots are likely to open if you give it 10-15 minutes.
The Hidden Lake Overlook trail is about 2.7 miles round trip, with a lot of climbing at the beginning. You start your hike behind the visitor center and walk along a boardwalk with several sets of stairs.
The hike is well worth the effort if you feel confident to continue past the boardwalk. Here we saw mountain goats and even grizzly bears (from afar). If you decide to tackle this trail with your family, take it slow, stay safe, and enjoy the scenery and wildlife that make this hike one of Glacier’s top experiences.
Day 3 in Glacier: Kayak, Relax, and Explore
After a long day of hiking and driving, use this last day of your 3-day itinerary to explore in a different way so you can return home feeling rejuvenated, not drained.
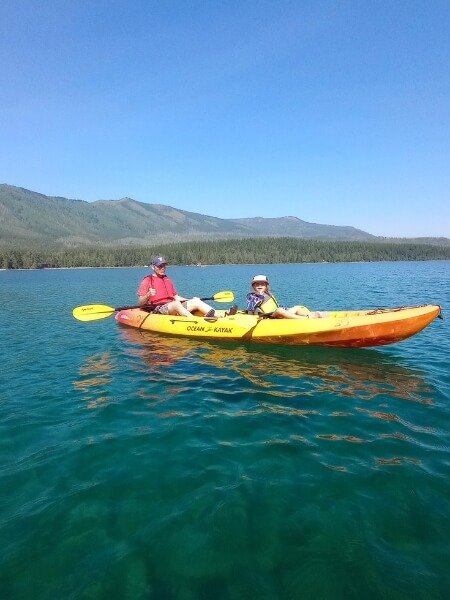
Rent Kayaks
We booked kayak rentals a few weeks before our trip from Glacier Outfitters located in Apgar Village near the shore of Lake McDonald. They also offer rentals on a first-come, first-served basis for those who need a little more flexibility in their planning.
Two hours was plenty of time, and we probably were out on the water for just about an hour. Older kids might have more stamina and interest, but there was no need for a half or full-day rental for our beginning skills. The water is incredible and crystal clear in the shallows, and it was so peaceful being out in the water with such dramatic scenery everywhere.
Wanting to kayak in Glacier with your kids? Read my detailed post here and learn all you need for a successful trip!
Take it Easy and Grab Lunch
Once you return your kayaks, consider stopping at Eddie’s Café for a satisfying lunch and maybe even some ice cream. Their menu includes burgers, sandwiches, salads, and more with prices that run from about $14-$20 for adult entrees and $10-$11 for a kids meal. Drinks, fries, and desserts are an additional cost. While it might not be the cheapest place to eat, it might be worth the splurge for the convenience.
There are great places to picnic along the beach or in a few grassy areas nearby for those who packed lunch or snacks ahead of time. If you are heading out of the park, you can also grab food in West Glacier, Columbia Falls, or Kalispell. If you are heading back into the park, you can also find food at the Lake McDonald Lodge including pizza and sandwiches at Jammer Joe’s or more fine dining options at Russell’s Fireside Dining Room. Just remember you often pay a premium when you are in the park.
Easy Hikes and Overlooks
If you choose to stay in the park for the rest of the day, there are several low-key activities you can choose from. If you have a vehicle reservation for Going-to-the-Sun Road, you can try one (or several) of these shorter hikes or overlooks:
- Pull over at the viewpoints along the road. If you want to be spontaneous, just pull over into any open parking lot along the Going-to-the-Sun Road. There is most likely an overlook or short hike to explore. Always bring bear spray, water, and snacks, and read any signs at trailheads to be as prepared as possible.
- Johns Lake Loop – Partially closed in 2024, so it is an out-and-back rather than a loop.
- A portion of the Upper McDonald Creek Trail (The entire out and back is 5.6 miles, but you can just hike part of it.)
If you don’t have a reservation but still want to explore, you can try the Rocky Point Trail. It’s about 2 miles out and back and provides access to Lake McDonald in a few spots. If you plan on visiting the shore, make sure to have water shoes or hiking sandals, and be aware that in some locations there are ants that will climb and possibly bite. They aren’t a huge deal, but being aware of them can save you some grief. This trail does not originate off Going-to-the-Sun Road, so while you do need to pay the park entrance fee, you do not need to have a vehicle reservation.
Best Time to Visit Glacier National Park
We visited Glacier in mid-July which is peak tourist season. While there were certainly crowds, we were able to avoid long lines and crowds for most of our trip. If traveling in July and early August, I recommend staying in the park to get an early start.
Late August and early September would be a great time to visit as the crowds lessen (slightly). However, when dealing with school schedules you don’t always have that option, and there is an increased risk of wildfires in the region, with possible smoke.
Late June can be a great time as well, but the weather can be questionable and some roads may still be closed. Honestly, the best time to visit Glacier is any time in the summer or early fall when you can make the time work for you!
How do You Get to Glacier?
Road
Glacier is a great road trip destination, although you will be spending quite a bit of time in the car. We drove from Salt Lake City and took two days to complete the 650-mile journey (about 10 hours in the car), although it is doable in one day if you have the stamina. Other major cities you can road trip from include Seattle (550 miles/9 hours) and Calgary (230 miles/5 hours). It is 400 miles from Yellowstone (6.5 hours) and 470 miles from Grand Teton (8.5 hours), and shares a border with Canada’s Waterton Lakes National Park.
Air
Glacier International Airport is located in Kalispell, MT, about 40 minutes from the Apgar Visitor Center. Other, larger, airports you can fly into include: Missoula, MT (2.5 hours) and Bozeman, MT (5.5 hours). Bozeman is located about 90 minutes north of the north entrance to Yellowstone and might be a good choice if wanting to visit both parks.
Train
Amtrak has stations in West Glacier (WGL), East Glacier (EGL), and Whitefish, MT. The West Glacier station is about 10-15 minutes (driving) from the Apgar Visitor Center and the East Glacier station is located about 30 minutes from the Two Medicine entrance and about 45 minutes from the Saint Mary Visitor Center. Please note, it may be difficult to rent a car in West Glacier and East Glacier, so research before booking tickets. Hertz is listed as having a car rental location at the West Glacier Amtrak stop, but availability may be limited. If you are skipping a car, you can purchase a shuttle ticket that will take you from the West Glacier Train Station to Lake McDonald Lodge or Apgar Village Inn. Whitefish is 45-60 minutes from the Apgar Visitor Center but is a larger town with more amenities.
Which Glacier National Park Entrance is Best?
We stayed on the west side and loved our experience. But if we had one or two more days, I would have spent 2 nights on the west side and 2-3 nights on the east side to have quicker access to the Many Glacier and Two Medicine regions of the park. From there we could take a boat tour and hike to Grinnell Glacier (possibly – even with a boat tour it is close to 7 miles R/T), enjoy Swiftcurrent Lake, explore Eagle Falls and Appistoki Falls, and more.
Unless you stay for a week or more, you will probably “miss” something at Glacier. Don’t let that stop you from enjoying what you can see. Pick a region and enjoy what it has to offer.
Final Thoughts
Now you have the perfect 3-day itinerary for Glacier National Park, it’s time to start planning! Pick some dates, start researching, and get those plans set. If the travel planning process feels overwhelming or you want to know about the best resources and methods, join the Family Travel Framework – my comprehensive DIY travel planning course that takes you through the entire planning process from beginning to end.
Want someone to do all the heavy lifting? Consider one of my custom travel planning services – where I coach you through the planning or do the research myself! Travel with your family should be about connection and time together – not stress and worry.
And if you’re planning a national parks vacation, check out my other posts on the parks and join the National Parks for Families Facebook group where you can ask all your travel planning questions!